Viz Artist User Guide
Version 3.13 | Published March 28, 2019 ©
Extrude
![]()
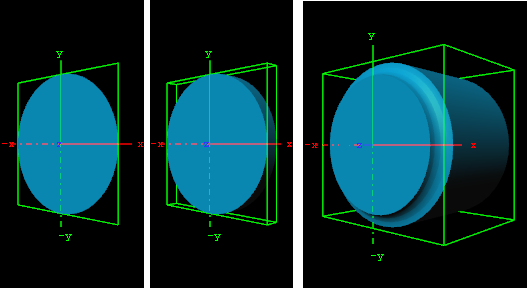
An Extrude plug-in can be explained simply as extruding or sweeping the 2D item through space along its Z-axis. The sweeping path the item is followed during this process is used to create a surface. A a result a 3D item with front, back and sides is created from the 2D item.
Note: This plug-in is located in: Built Ins -> Container plug-ins -> Global
Extrude Properties

-
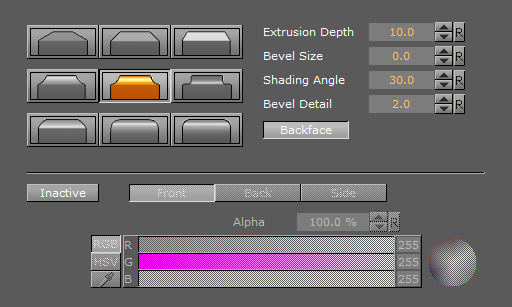
Bevel Types: The buttons marked with different bevel types are used to set the type of bevel to use on the figure.
-
Extrusion Depth: Sets the extrusion depth on the Z-axis.
-
Bevel Size: Sets the size of the bevel. This must be set to some value to enable the selection of bevel type.
-
Shading Angle: Sets the angle of the shading function. To “erase out” unevenness, try increasing the shading angle.
-
Bevel Detail: Sets the degree of detail of the bevel. The lower the value is set the more detailed the bevel is constructed. The more detailed the bevel is, the smaller tilings its constructed from.
-
Backface: Allows you to enable or disable visualization of the backface.
If colors are set to Active, you can edit the items Front, Back and Side color by using the sliders or changing the values.
Note: Adding the Extrude plug-in to a font sets the font’s quality to Normal and disables the Quality selector in the Text Editor
To Extrude a 2D object

-
Create a group and add the Circle geometry plug-in and material to it.
-
Add the Extrude plug-in to the same container.
-
Open the Extrude editor and select one of the bevel effects, and set Extrusion depth to 100.0 and Bevel Size to 10.0.