Viz Arc User Guide
Version 1.9 | Published October 31, 2023 ©
OCR
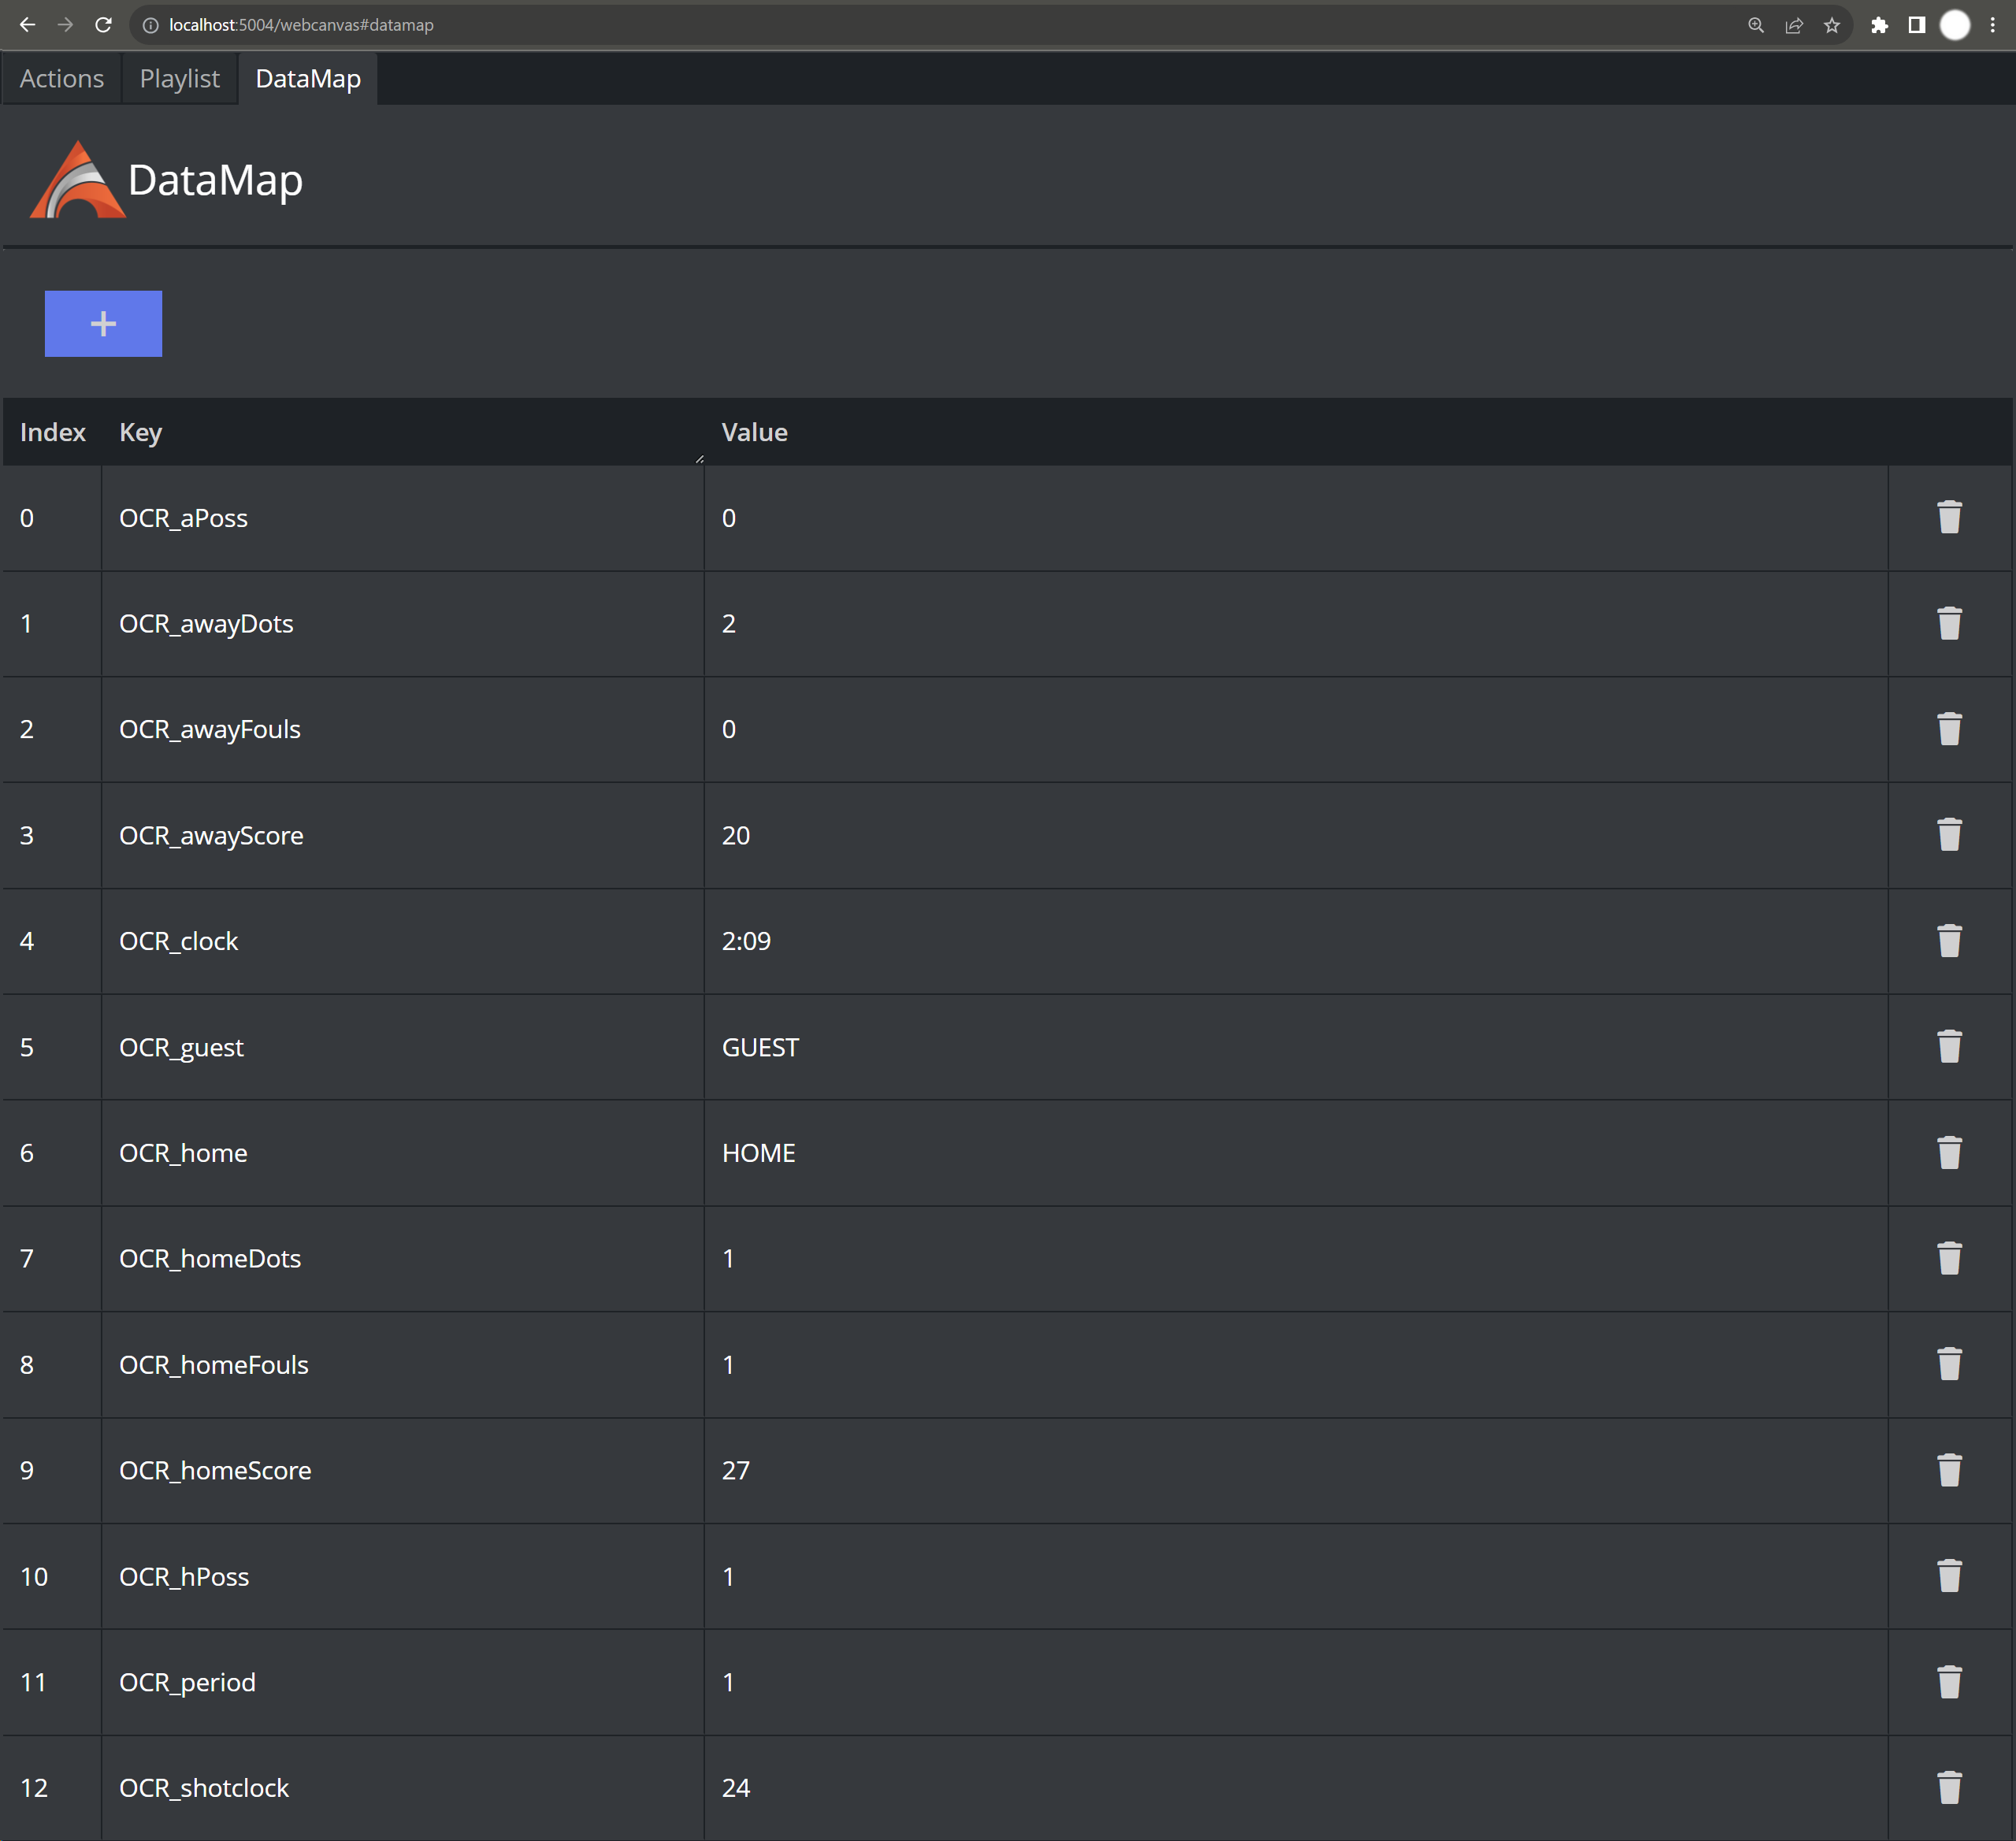
The OCR (Optical Character Recognition) widget enables to recognize any characters or numbers from a video source and store them in the DataMap.
To Add an OCR Widget
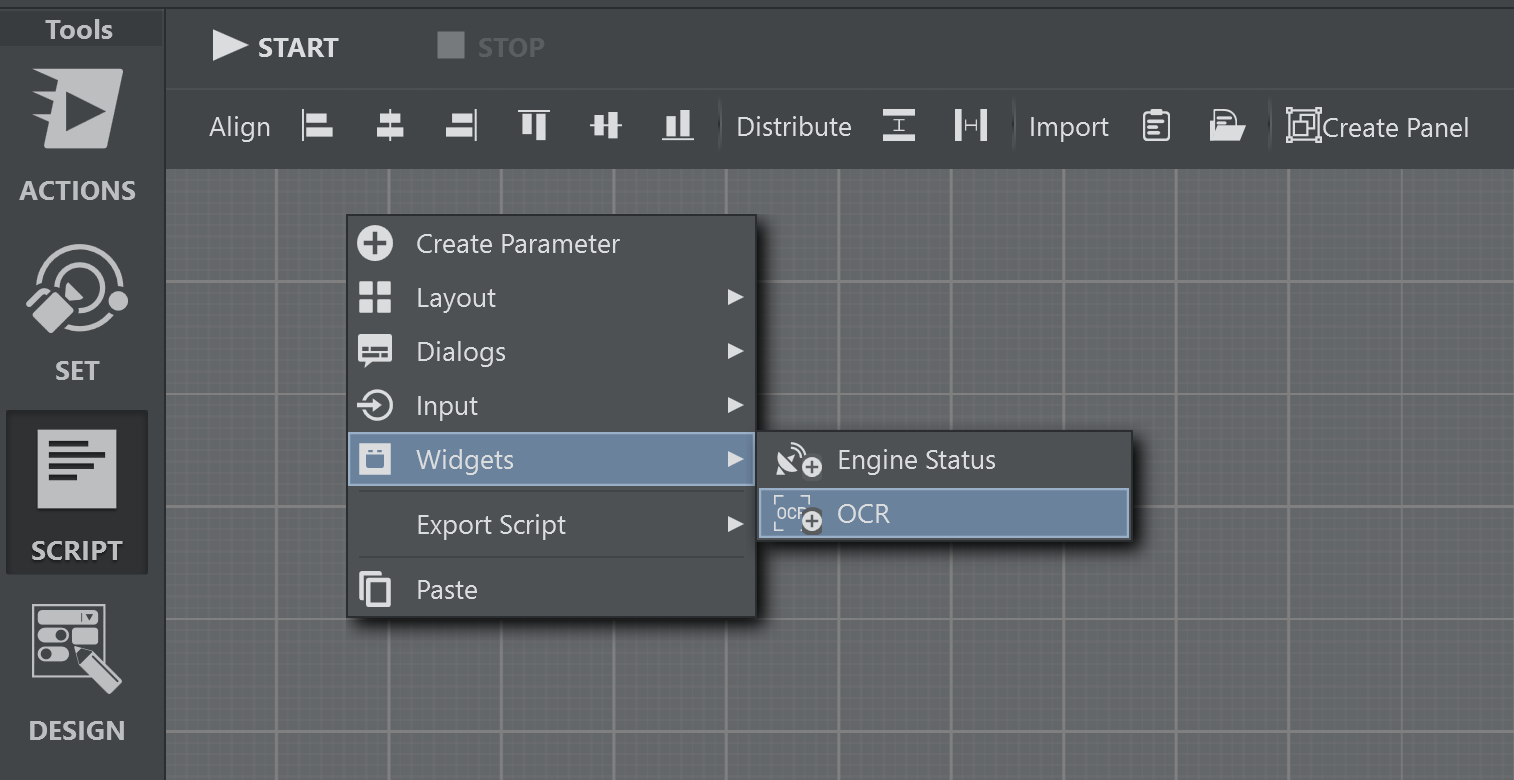
Go to the main script (or any template script), right click on the UI editor and select Widgets > OCR.
Resize and position the widget. Start the script.

You can add multiple widgets.

Sources
Select a Source in the drop down menu. The widget supports two types of sources:
-
SMURF: Read from a shared data stream identified by given key. This needs both the key and the synckey to work.
-
NDI: Each NDI stream found is listed in the drop down.

Warp
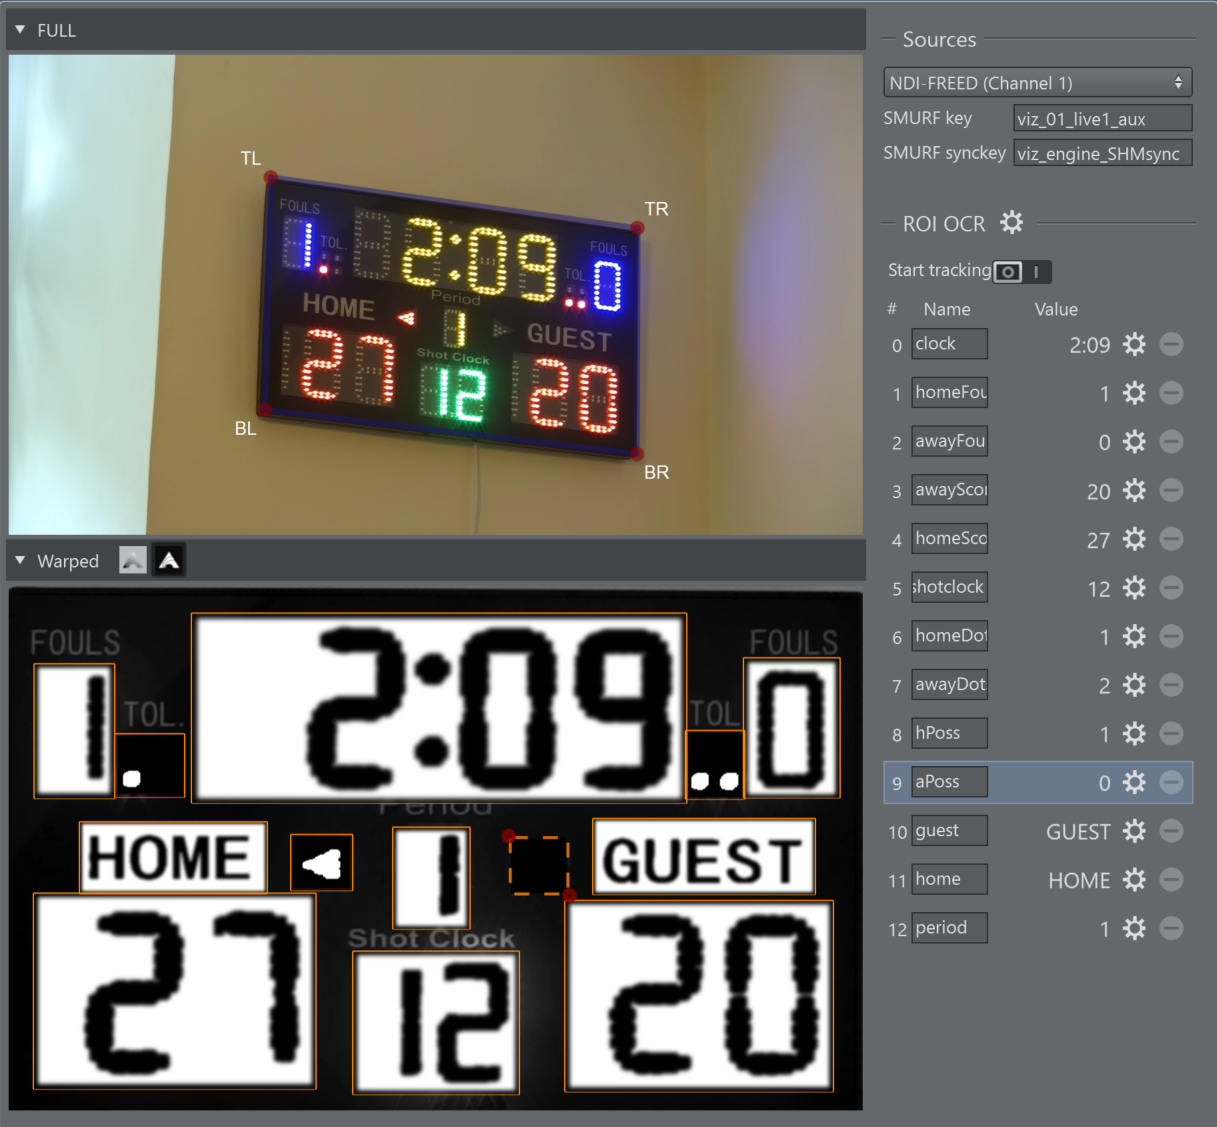
Herdly the camera is not perpendicular to the target (ex. scoreboard), so the image needs to be warped. This step helps the OCR algorithm and improves the results.
Wrap the quad around the target grabbing the red circles.
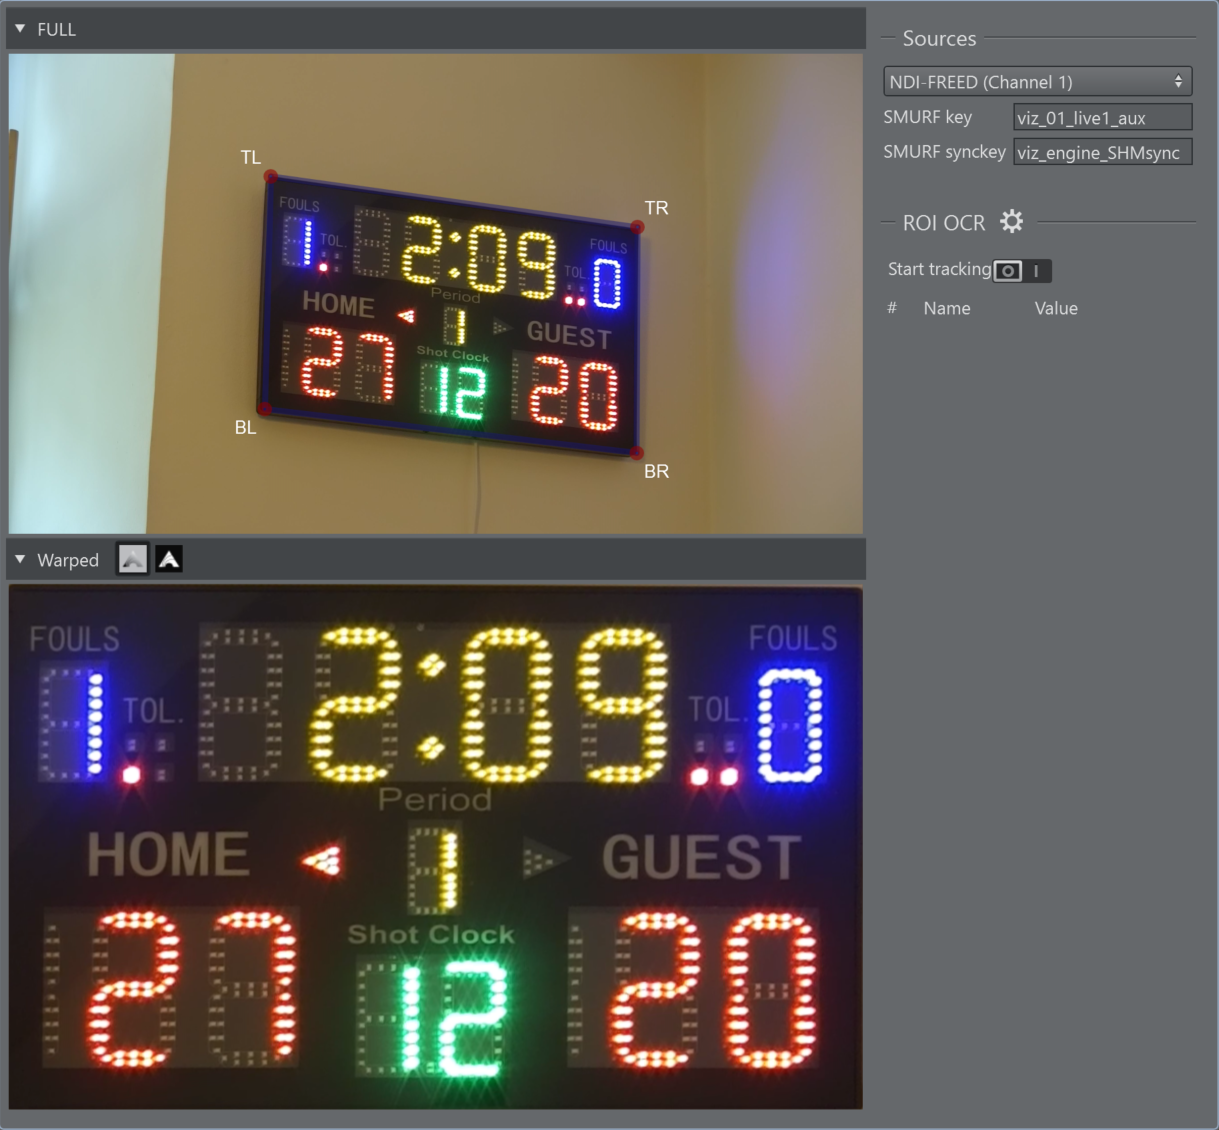
Zoom the image with the mouse wheel, helping to wrap the target more precisely.

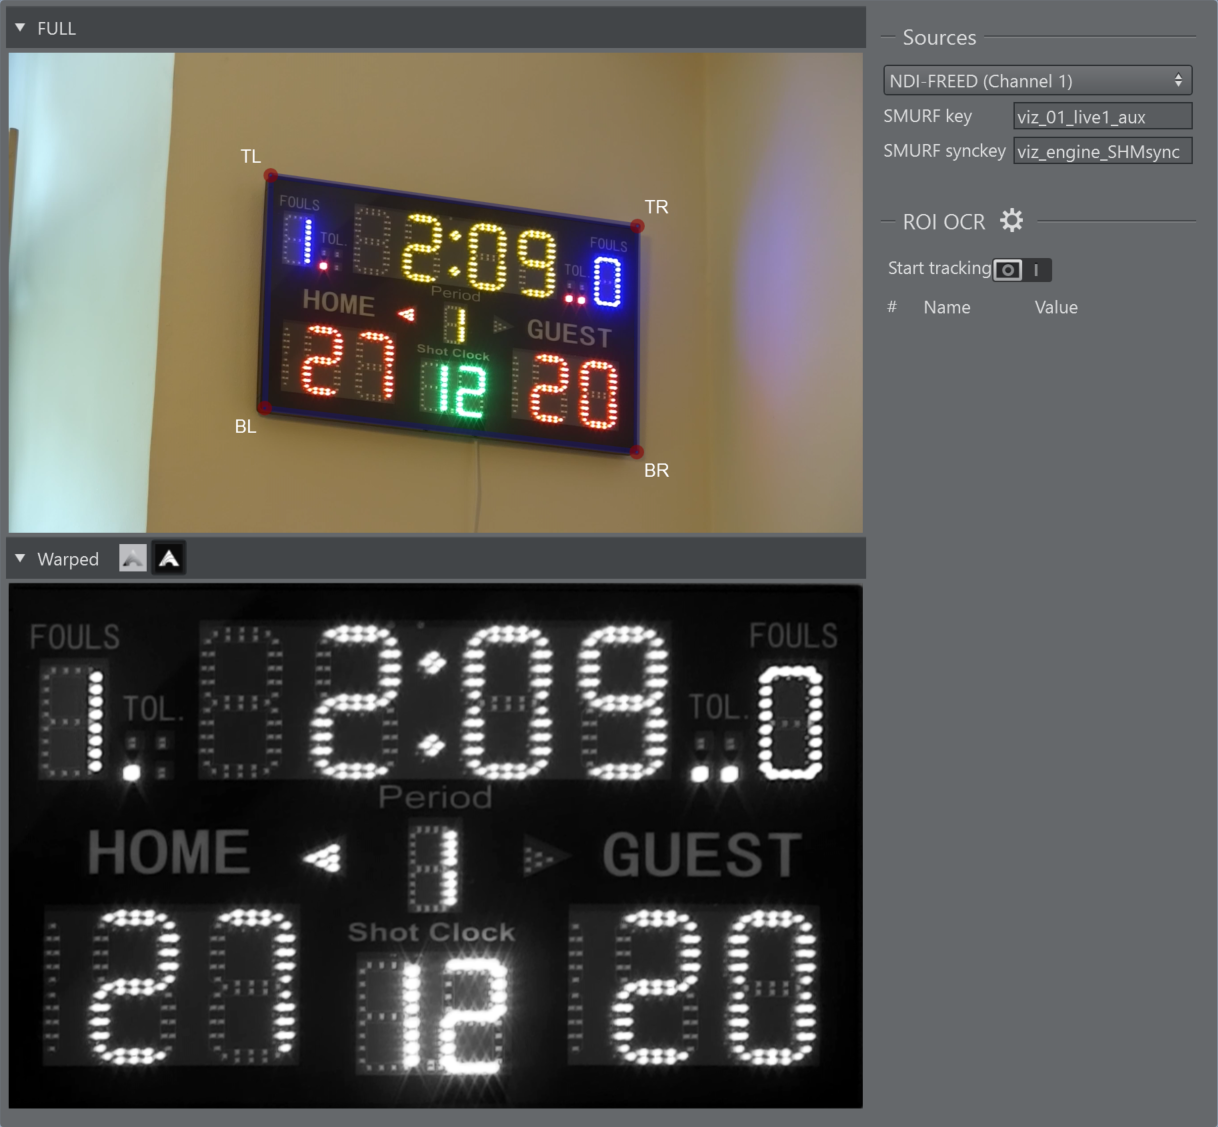
The OCR algorithm works with black and white images; to see the actual image used, you can click on the Show Key button next to the Warped expander.
Global Settings
-
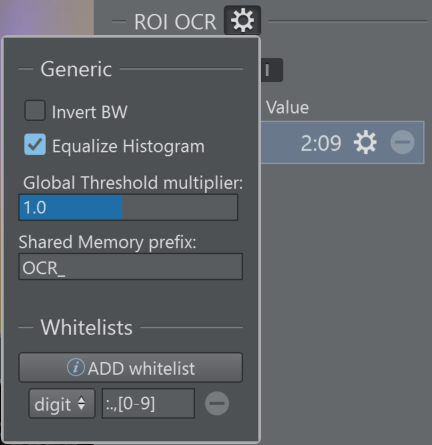
Invert BW: The OCR algorithm works best with black chars on white background, if the result of binarization is inverted you can click on this checkbox to fix it.
-
Equalize Histogram: Enhances the contrast and helps to be less sensible to light changes.
-
Global Threshold multiplier: If there is a light change that leads the algorithm to mixed results, it is possible to use this slider to change all the threshold values of the OCR Rois.
-
Shared Memory prefix: This string is prepend to the OCR Roi name and the result is used as a key in the share memory datamap.
-
Whitelists: It is possible to suggest the allowed chars to improve the results, it doesn't support regular expressions but has some keywords:
-
[a-z] all lowercase letters.
-
[A-Z] all uppercase letters.
-
[0-9] all digits.
-
[a-zA-Z] all letters.
-
[a-zA-Z0-9] all letters and digits.
-
ROI (Region Of Interest)
Add a New ROI OCR
-
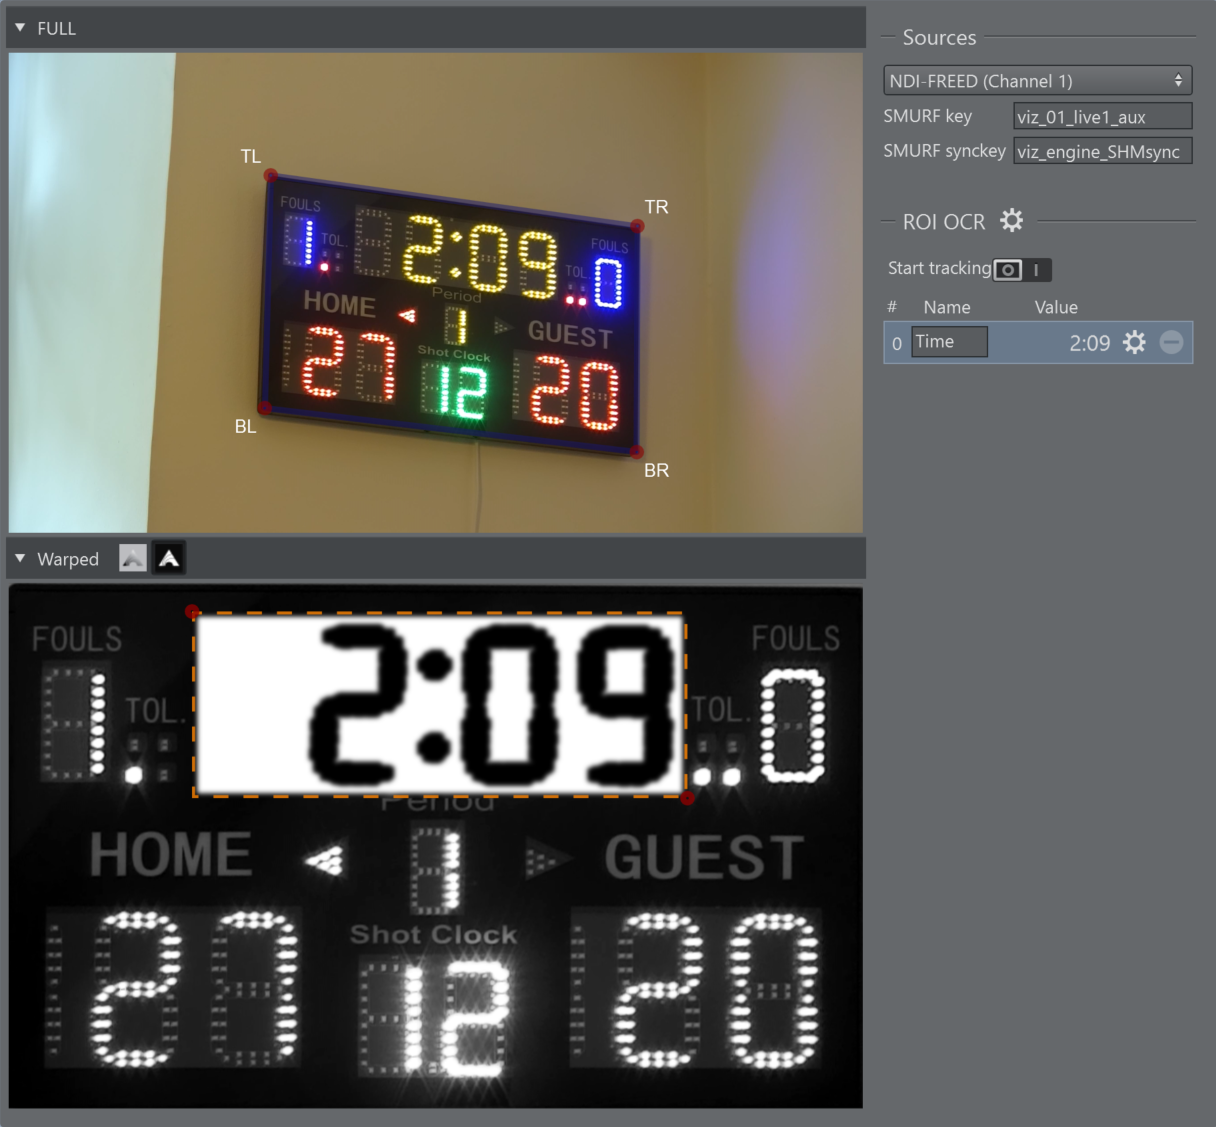
Click and drag the left mouse button in the Warped View to begin drawing the rectangle from its first corner.
-
While holding the left mouse button, drag to the required size.
-
Releasing the left mouse button.
It is possible to adjust the size of the ROI by grabbing the top left corner or the bottom right.
Properties
ROI Settings
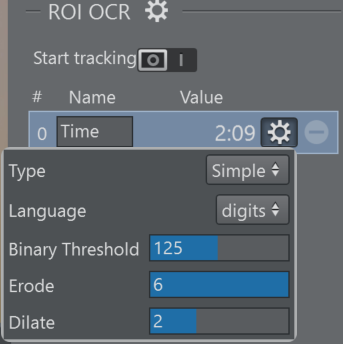
-
Type:
-
Simple: Normal OCR algorithms.
-
Dots: Count the dots in the ROI.
-
-
Language: Language selection to improve the results (even better if used in conjunction with the whitelist)
-
Binary threshold: The OCR algorithm works on black and white images, therefore a threshold must be applied. In the Warped option, if you click on the ShowKey button you'll see a grayscale image where the pixel value range is between 0 and 255, so every pixel below the threshold will be white and black if above.
-
Erode: T he bright areas of the image get thinner, whereas the dark zones gets bigger.
-
Dilate: T he dark areas of the image get thinner, whereas the bright zones gets bigger.
Templates and DataMap
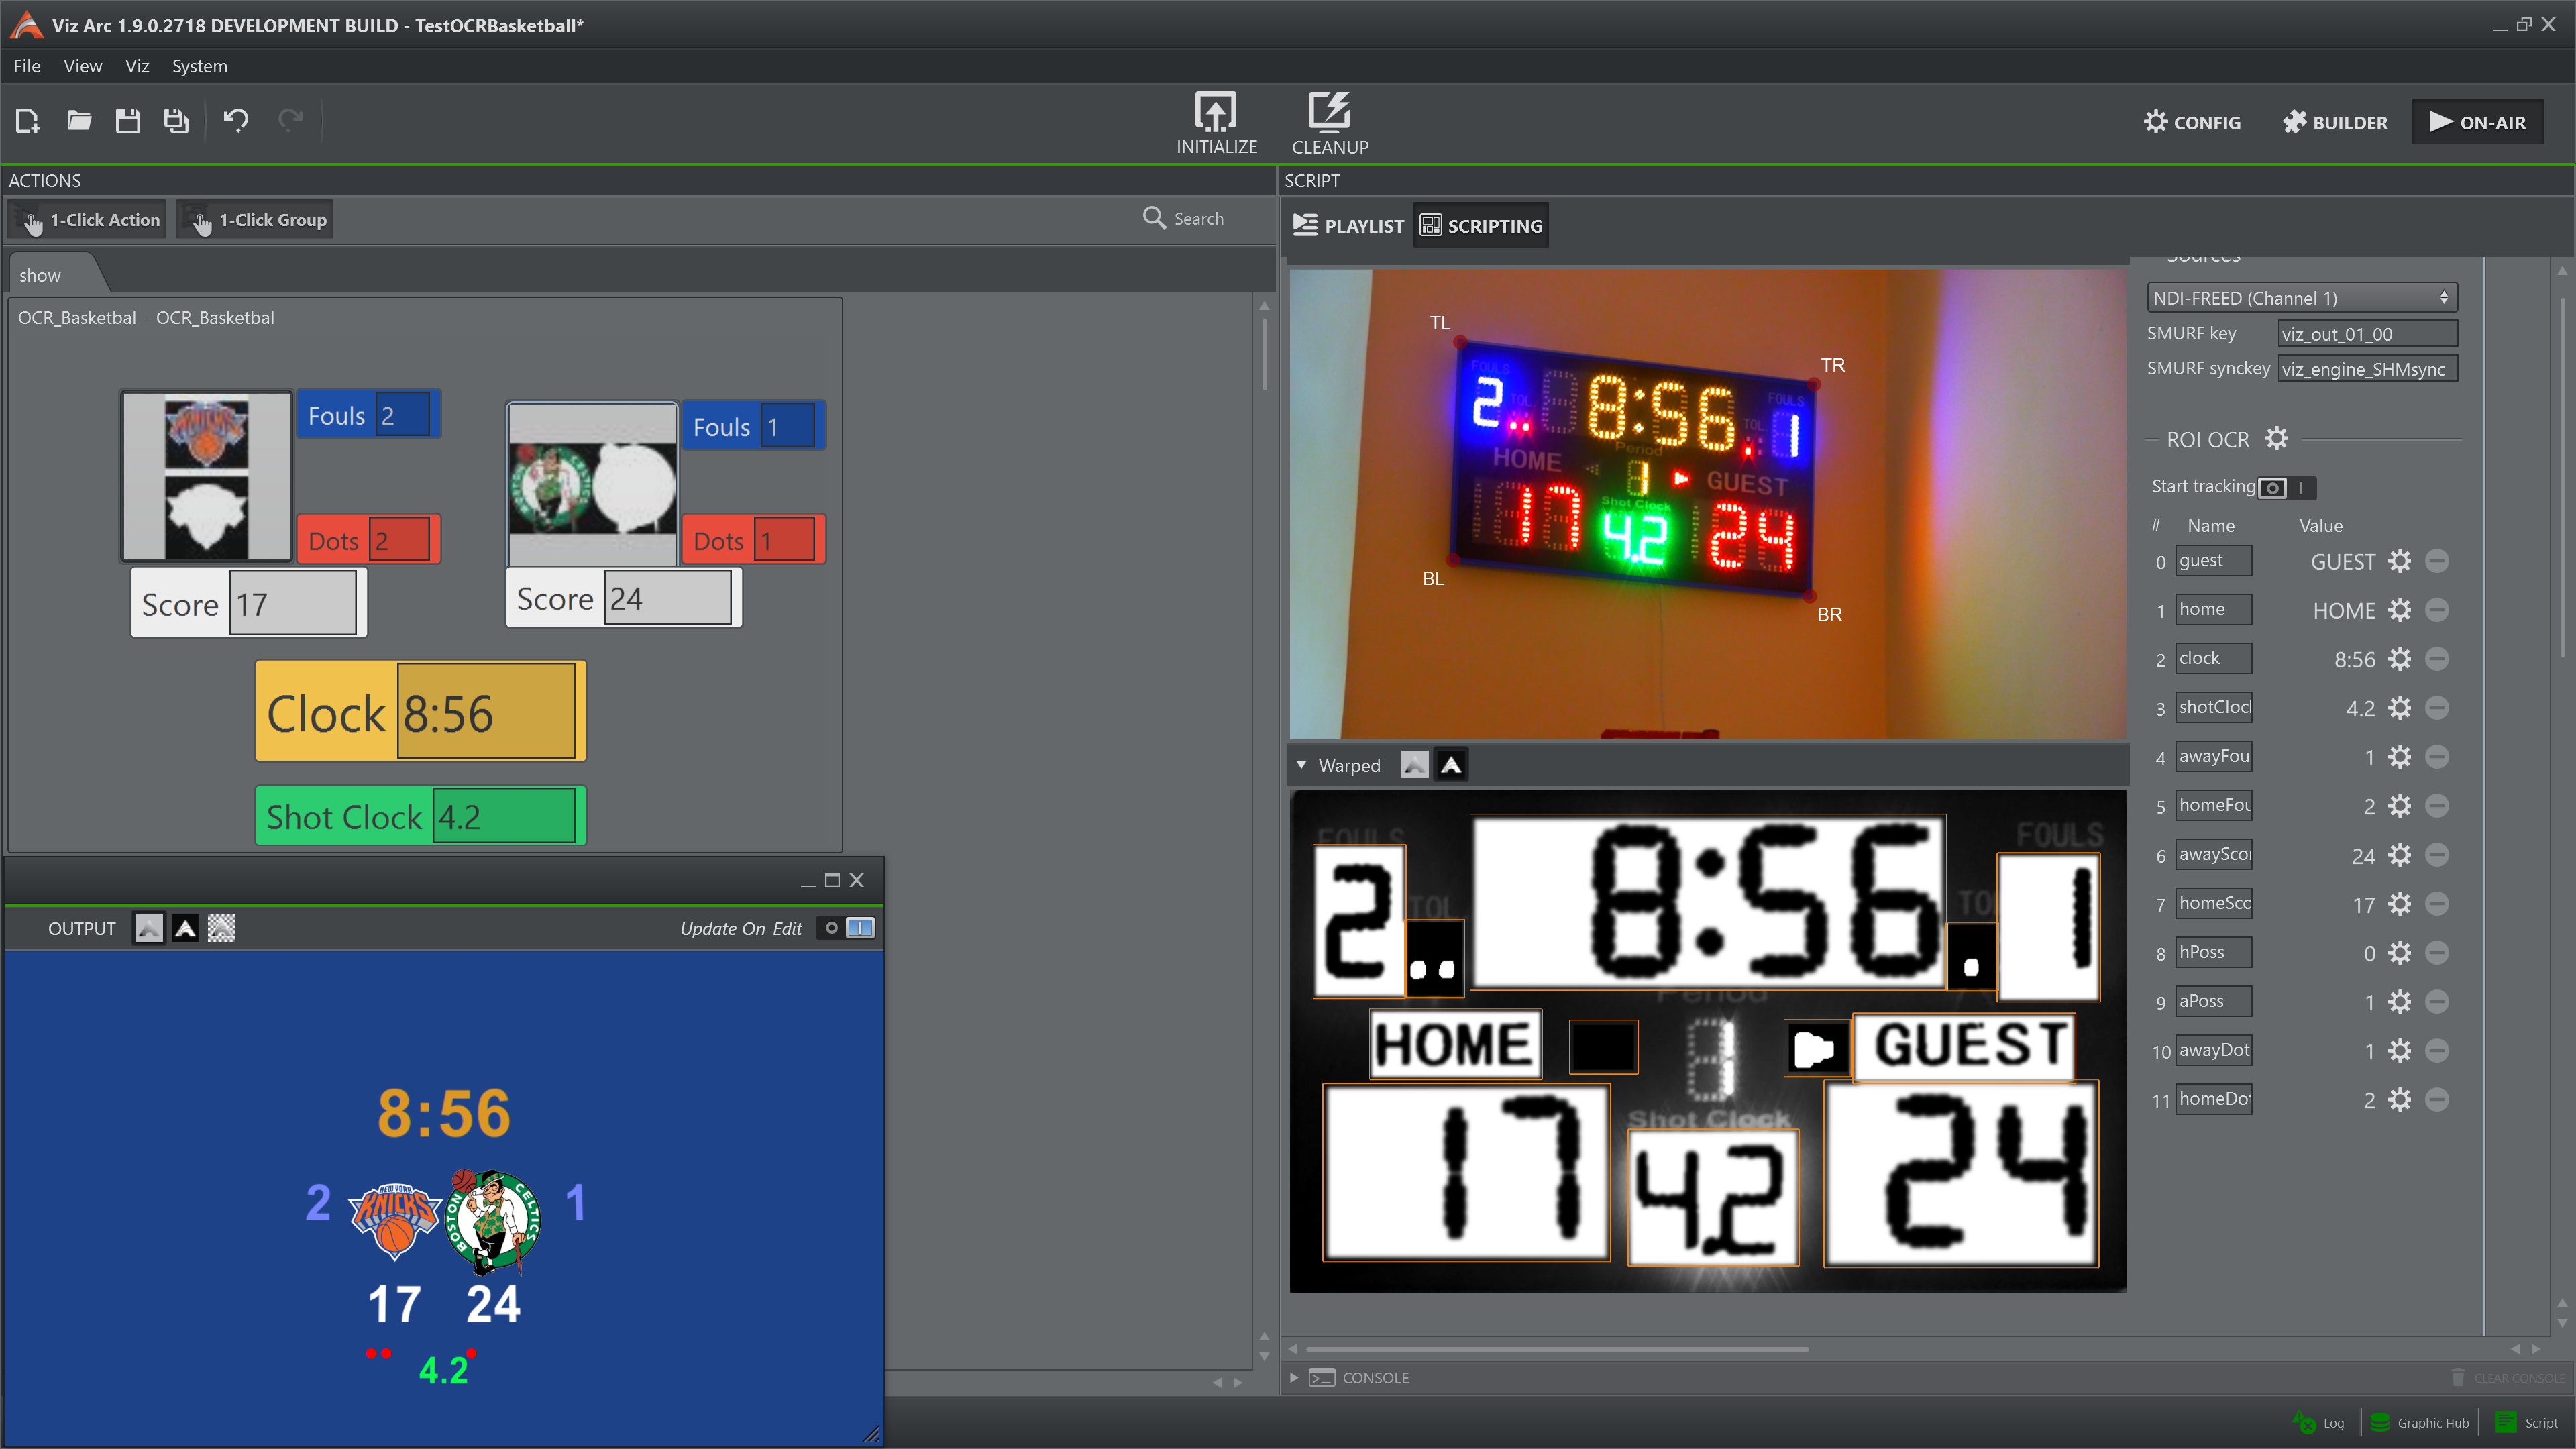
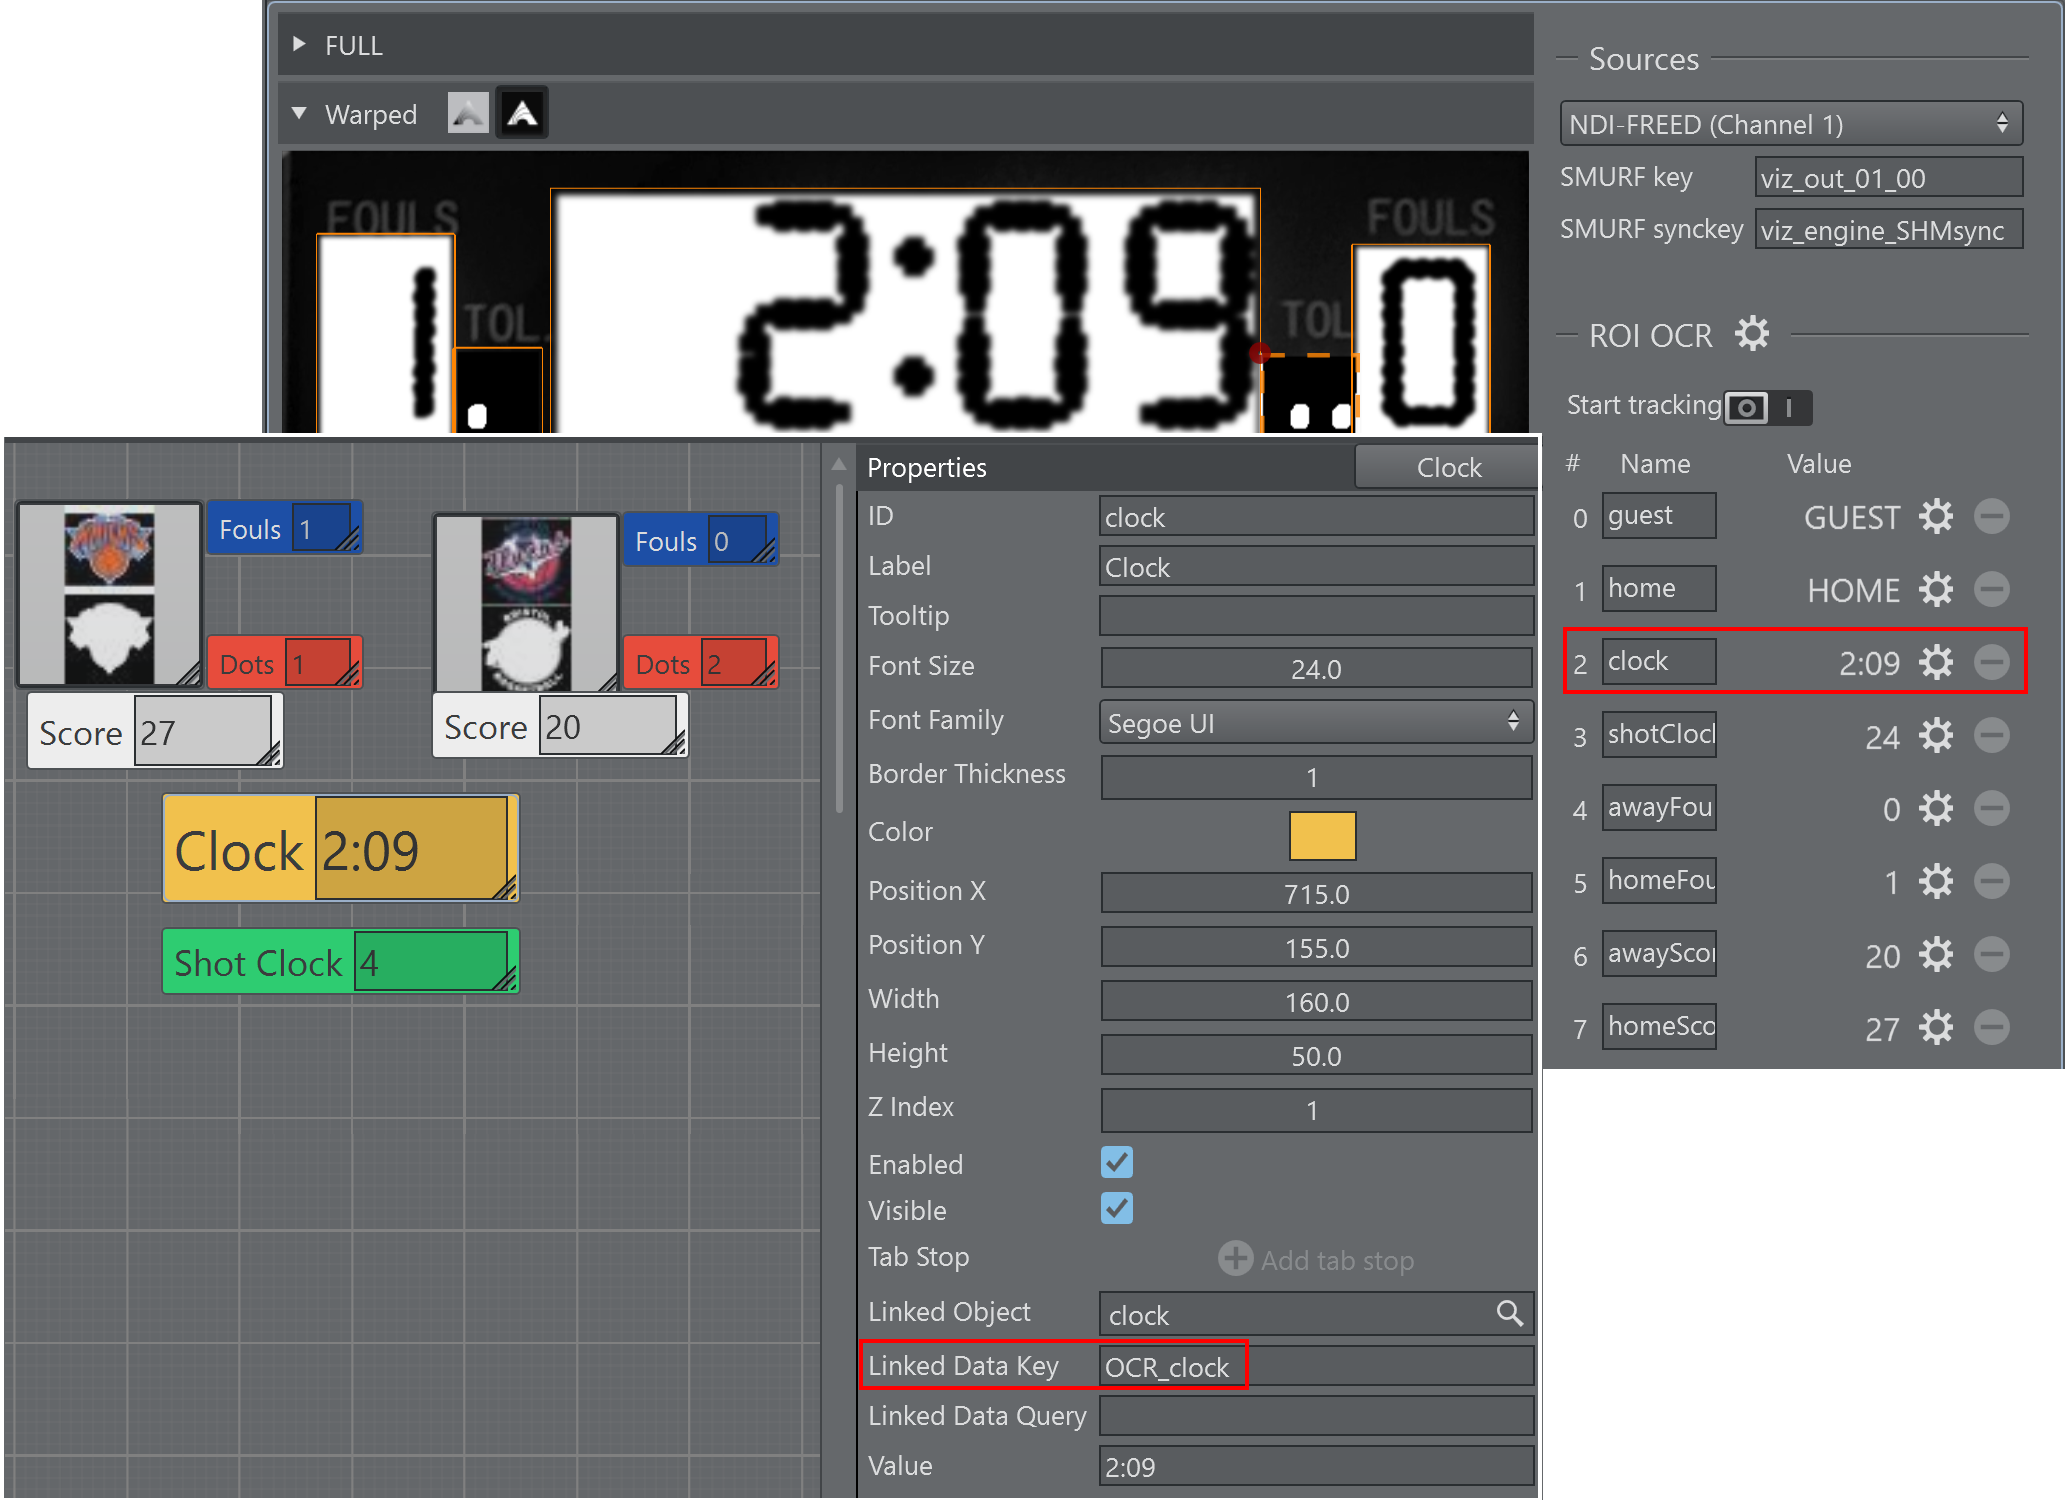
Thanks to the DataMap it is possilbe to link the results of the OCR to any template object as show below:

This an example on how to link a template object to an ROI result:
Tracking
When the tracking is enabled, the algorith tries to follow the "target". Even if the camera moves, it continues to operate without the intervention of the user.
The quad changes color to confirm the tracking has started. While tracking is not possible to move/grab the control corners.
![]()
![]()
