
Graphic Hub Administrator Guide
Version 3.2 | Published October 18, 2018 ©
Schedule a Deploy Task
Deploy tasks can be scheduled to run on a regular basis. This is useful to replicate data for safekeeping on a regular basis.
To run scheduled Deploy Tasks the Viz Deploy Agent must be installed.
IMPORTANT! To configure a scheduled deploy task when the servers or the Deploy Agent are on different subnets, each server must be logged on to with its IP address, not its host name. Sign out of all servers and log back on using the servers IP address (see Graphic Hub Login and Log Out).
To Add a Deploy Agent for Use
IMPORTANT! Deploy Agents not reachable via UDP broadcast and / or for use in Login profiles need to be added manually.
-
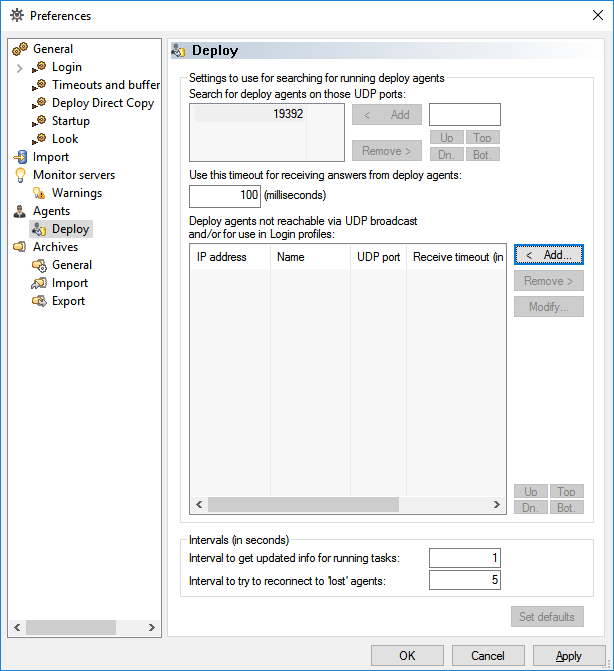
Open Tools > Edit preferences.
-
Navigate to Agents > Deploy.
-
Press Add.
-
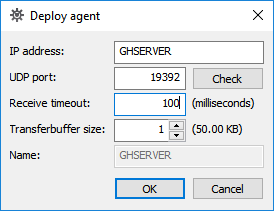
Insert hostname or IP address.
-
Provide UDP port (default: 19392).
-
Press OK.

-
Confirm all open windows.
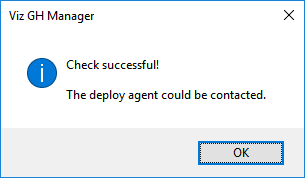
The Deploy Agent has been added to current configuration and can be found although not reachable via UDP broadcast.
To Schedule a Deploy Task
-
In Graphic Hub Manager, log-in to two or more servers.
-
Right-click a folder/project/file in the Servers and Folders panel or Files panel, and then from the menu that appears, select Create Deploy Task...
-
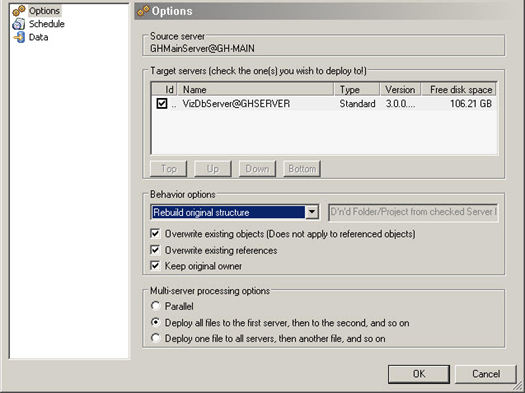
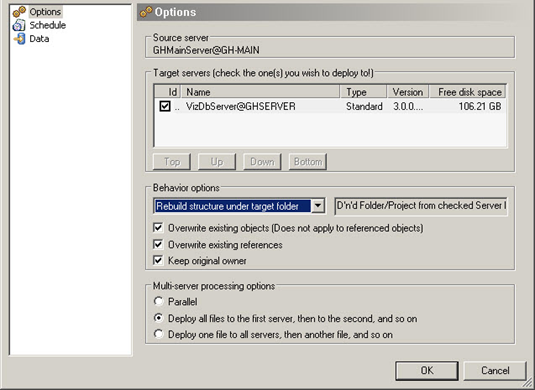
Select one or more target servers.
-
Select one of the Behavior options:
-
Rebuild original structure: Copies an exact replicate of all selected folders/projects/files and its references from source to destination server.
-
Rebuild structure under target folder: Copies an exact replicate of all selected folders/projects/files and its references from the source server to the destination folder on the destination server.
-
Copy to target folder only: Copies all selected folders/projects/files and its references from the source server to the destination folder on the destination server.
Tip: For Copy to target folder only and Rebuilt structure under target folder, you can also drag folders or projects into the field beside the Behavior options drop down menu.
-
-
Enable/disable the following Behavior options:
-
Overwrite existing objects (does not apply to referenced files)
-
Overwrite existing references
-
Keep original owner
-
-
Select one of the following Processing options:
-
Deploy all files to the first target server, then the next server in the queue, and so on.
-
Deploy one file to all target servers, then the next file in the queue, and so on.
-
-
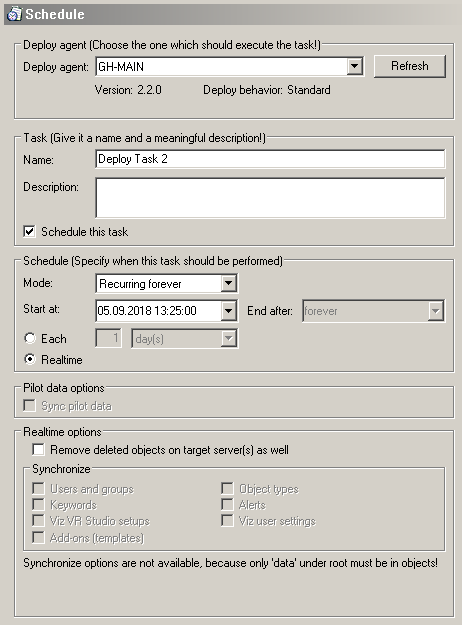
In the left panel, click Schedule.
-
From the Deploy agent drop down box, select a Deploy Agent.
Tip: If you have several Deploy Agents installed on various machines, and you intend to schedule many tasks, use a different Deploy Agent for each task for the purpose of load balancing.
-
Name and describe the task in the fields provided.
-
Check the Schedule this task check box.
Note: If you uncheck this box, the deploy task will execute right away, rather than wait for a scheduled time.
-
From the Mode drop down menu, select one of the following options:
-
Once.
-
Recurring.
-
Recurring forever.
-
-
In the Start at drop down menu, click to select a date from the calendar, and if necessary, adjust the time.
Note: You cannot schedule tasks to begin in the past.
-
If your mode is Recurring, in the End after drop down menu, click to select a date from the calendar, and if necessary, adjust the time.
-
Select one of the following radio button options:
-
Each: Select an interval.
-
Realtime: The deploy task will occur every time there is a change in the database. With this selection, you can optionally Remove deleted objects on the target server as well.
Note: Real-time tasks cannot be modified later.
-
-
In the left panel, click Data and drag any additional folders or files into the right panel, as necessary.
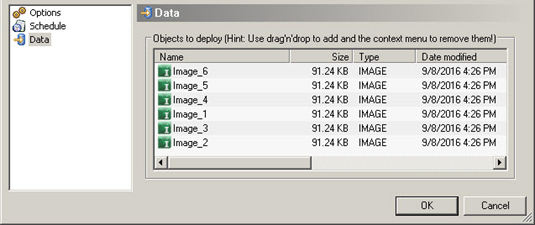
Caution: Do not drag sub-folders of any folders that are already in the right panel.
Note: You cannot drag files into the right panel for Real-time tasks.
-
Click OK to create the deploy task.