Viz Vectar Plus User Guide
Version 1.2 | Published April 12, 2022 ©
Working with Exports
-
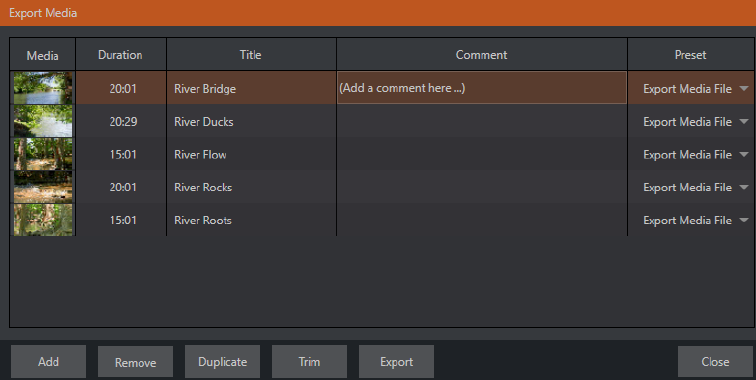
From the Dashboard’s File menu, select the Export Media panel.
Here you manage the list of clips and still images you wish to export.

-
Click the Add button in the footer to open a Media Browser, which you can then use to select (and multi-select) content you wish to export.
You can choose items from your current session or another location. These files are added to the bin, but they are not exported at this point.
Tip: You can add and upload files that you are currently recording (before pressing Stop). These files are in the virtual Session Recordings folder that the Media Browser displays for the session.
Metadata

-
Information is displayed for each media file added, including the file name (or alias, in the case of files added from a Media Player playlist), Duration, and Preset (depending on settings, multiple entries pointed at different destinations may be added in one operation).
-
The Comment column allows you to add remarks that are sent along with the upload to sites that support this. Click in this column to enable keyboard entry, or navigate to it and start typing. Press ENTER or click elsewhere to end editing.
-
Type in the Title column entry to change the title supplied for the file to social media accounts, but note that this has no effect on FTP or Transcode preset operations.
Presets
-
The Preset column provides a menu allowing you to change the export preset or even add multiple targets for each individual item in the Export bin.
A checkmark beside a preset indicates the target is active. -
Preset selections can vary from one item in the Export bin to the next.
If no checkmarks appear here, the entry on that row is not fully configured, and are ignored by the Export processor.
List Management

-
Remove: Deletes entries from the Export bin, without affecting the source files.
-
Duplicate: Clones selected entries. You may prefer this way of publishing an item to multiple targets (over adding multiple checkmarks to the Preset column for a single entry) at times.

-
For example, the encoding settings for one target may involve longer processing than you want to allow at the moment. Using a duplicate entry, you can defer processing that entry until a more convenient opportunity.
-
Trim: Opens a trimmer pane for adjusting In and Out points for clips you plan to share (some file formats do not support trimming).
Clips that are added while still being captured can be retrimmed while still growing.
Tip: Checkmark the Still Frame switch to select a frame and convert it to a JPEG image file on upload.
Export: An On and Off pilot light. When lit, the Export processor is activated, and is either watching for qualified Export bin entries ready for exporting, or actively processing those that are ready to go.
![]()
Note: The Export button is linked to the larger Dashboard Export button, which performs the same action.
Other Add to Methods
Once you have configured your Export presets, check-marked one or more in the Export menu, and decided whether to add checks to Stills, Clips, or both in the Auto Queue menu, you have configured a typical preset. However, there are additional sources you can add:
-
You can add either stills or clips to the Export bin from the playlist of a Media Player.
-
You can automate adding custom titles and comments.
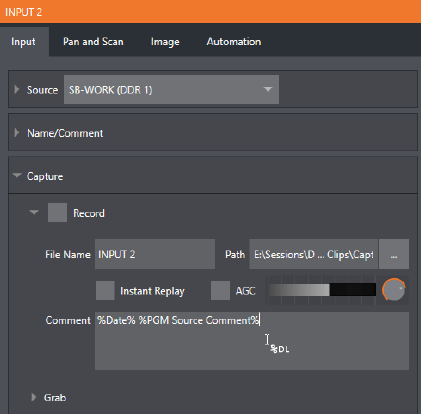
Grab, Record as well as the Media Players all support individual custom Names and Comments, which supplies the corresponding metadata for your Export Media additions.

-
The Name and Comment fields for Grab and Record features also support DataLink.
This lets you automatically supply unique and meaningful information to social media sites along with your Export uploads.
You can also mix DataLink keys with literal text, to produce comments that embed things like the current time, the current score of a game, or the name of the person on camera at the moment into coherent sentences.