Viz Licensing Administrator Guide
Version 3.0 | Published September 14, 2023 ©
Managing Licenses
As soon as the Licensing team issues a license, it will be immediately available for activation on the customers view of the portal.
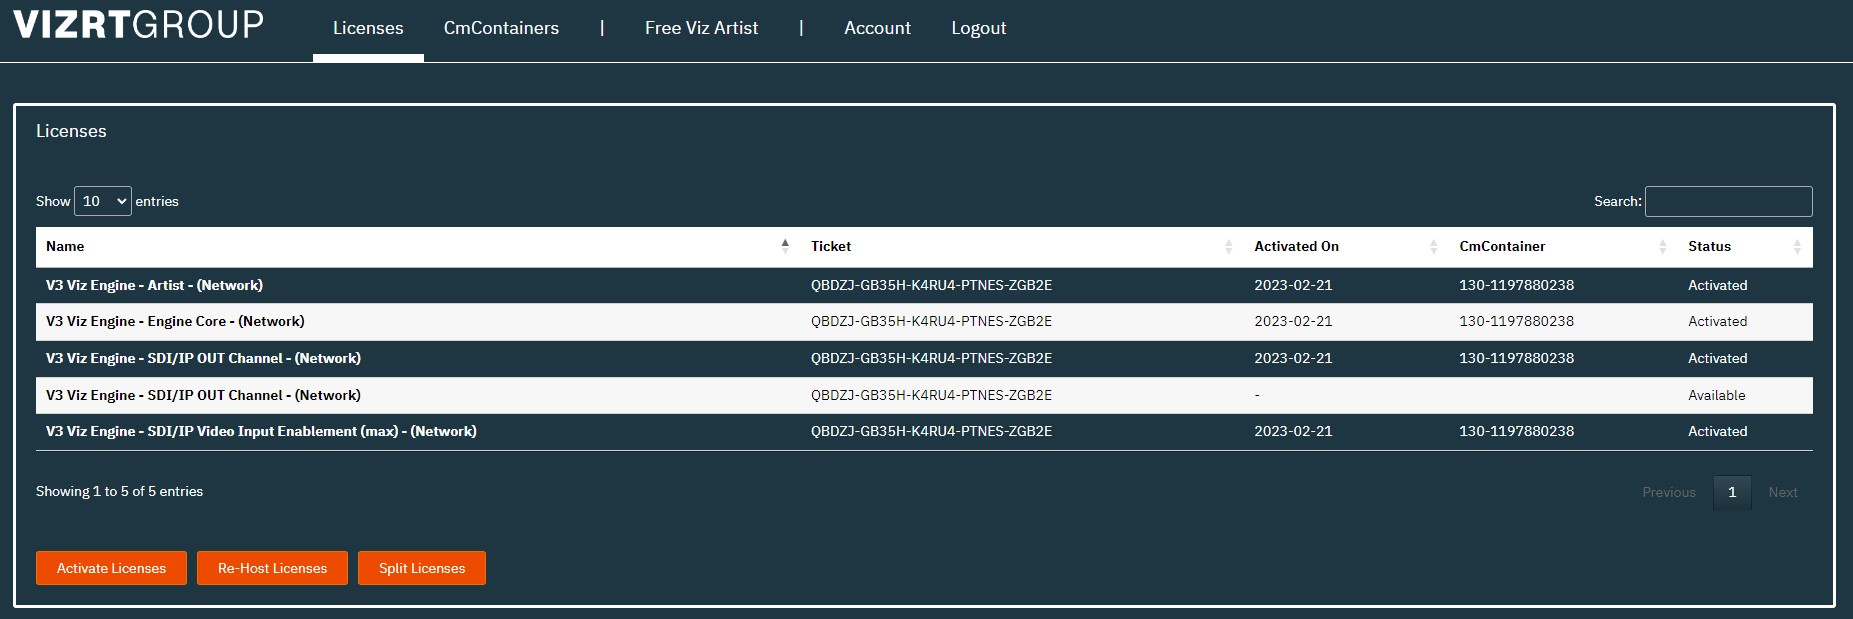
After login in, these are the available tabs:

-
Licenses: View of all the licenses.
-
CmContainers: Overview of the containers.
-
Free Viz Artist: For free Viz Artist sign ups.
-
Account: User information.
-
Logout: End session.
Activate Licenses
In the licenses tab you will find a list with all the licenses, a menu functionality to choose the number of entries for each page and the search option that you can use to search for a ticket ID or a product name.
If the user that is logged in has fewer permissions, only the Activate Licenses button will be available.

-
Activate Licenses: Activates the selected license.
-
Re-Host Licenses: Return a license to another user by selecting the container connected to the same machine.
-
Split Licenses: You are able to split licenses or the quantity of a license.
To activate a license, please follow the steps in Online License Activation.
CmContainers
After a license is activated, you will find in the CmContainers tab, the container that was created for your machine.

Free Viz Artist

In this section you can click Create License and it automatically creates a license available for 60 days, a predefined value, and once it expires a Renew button will appear for that license or you can create a new one.
Account
The account tab has basic information about the user you are logged in with and the account you belong to.

-
Email Address: User email address.
-
Name: Internal ID.
-
Description: Name of the customer.
-
Registered since: Since when it is registered.
In addition there is a download section where the Free Viz Artist, the CodeMeter Runtime and the Vizrt Offline Licensing Helper can be downloaded.

Note: All this information is stored and coming from Salesforce.