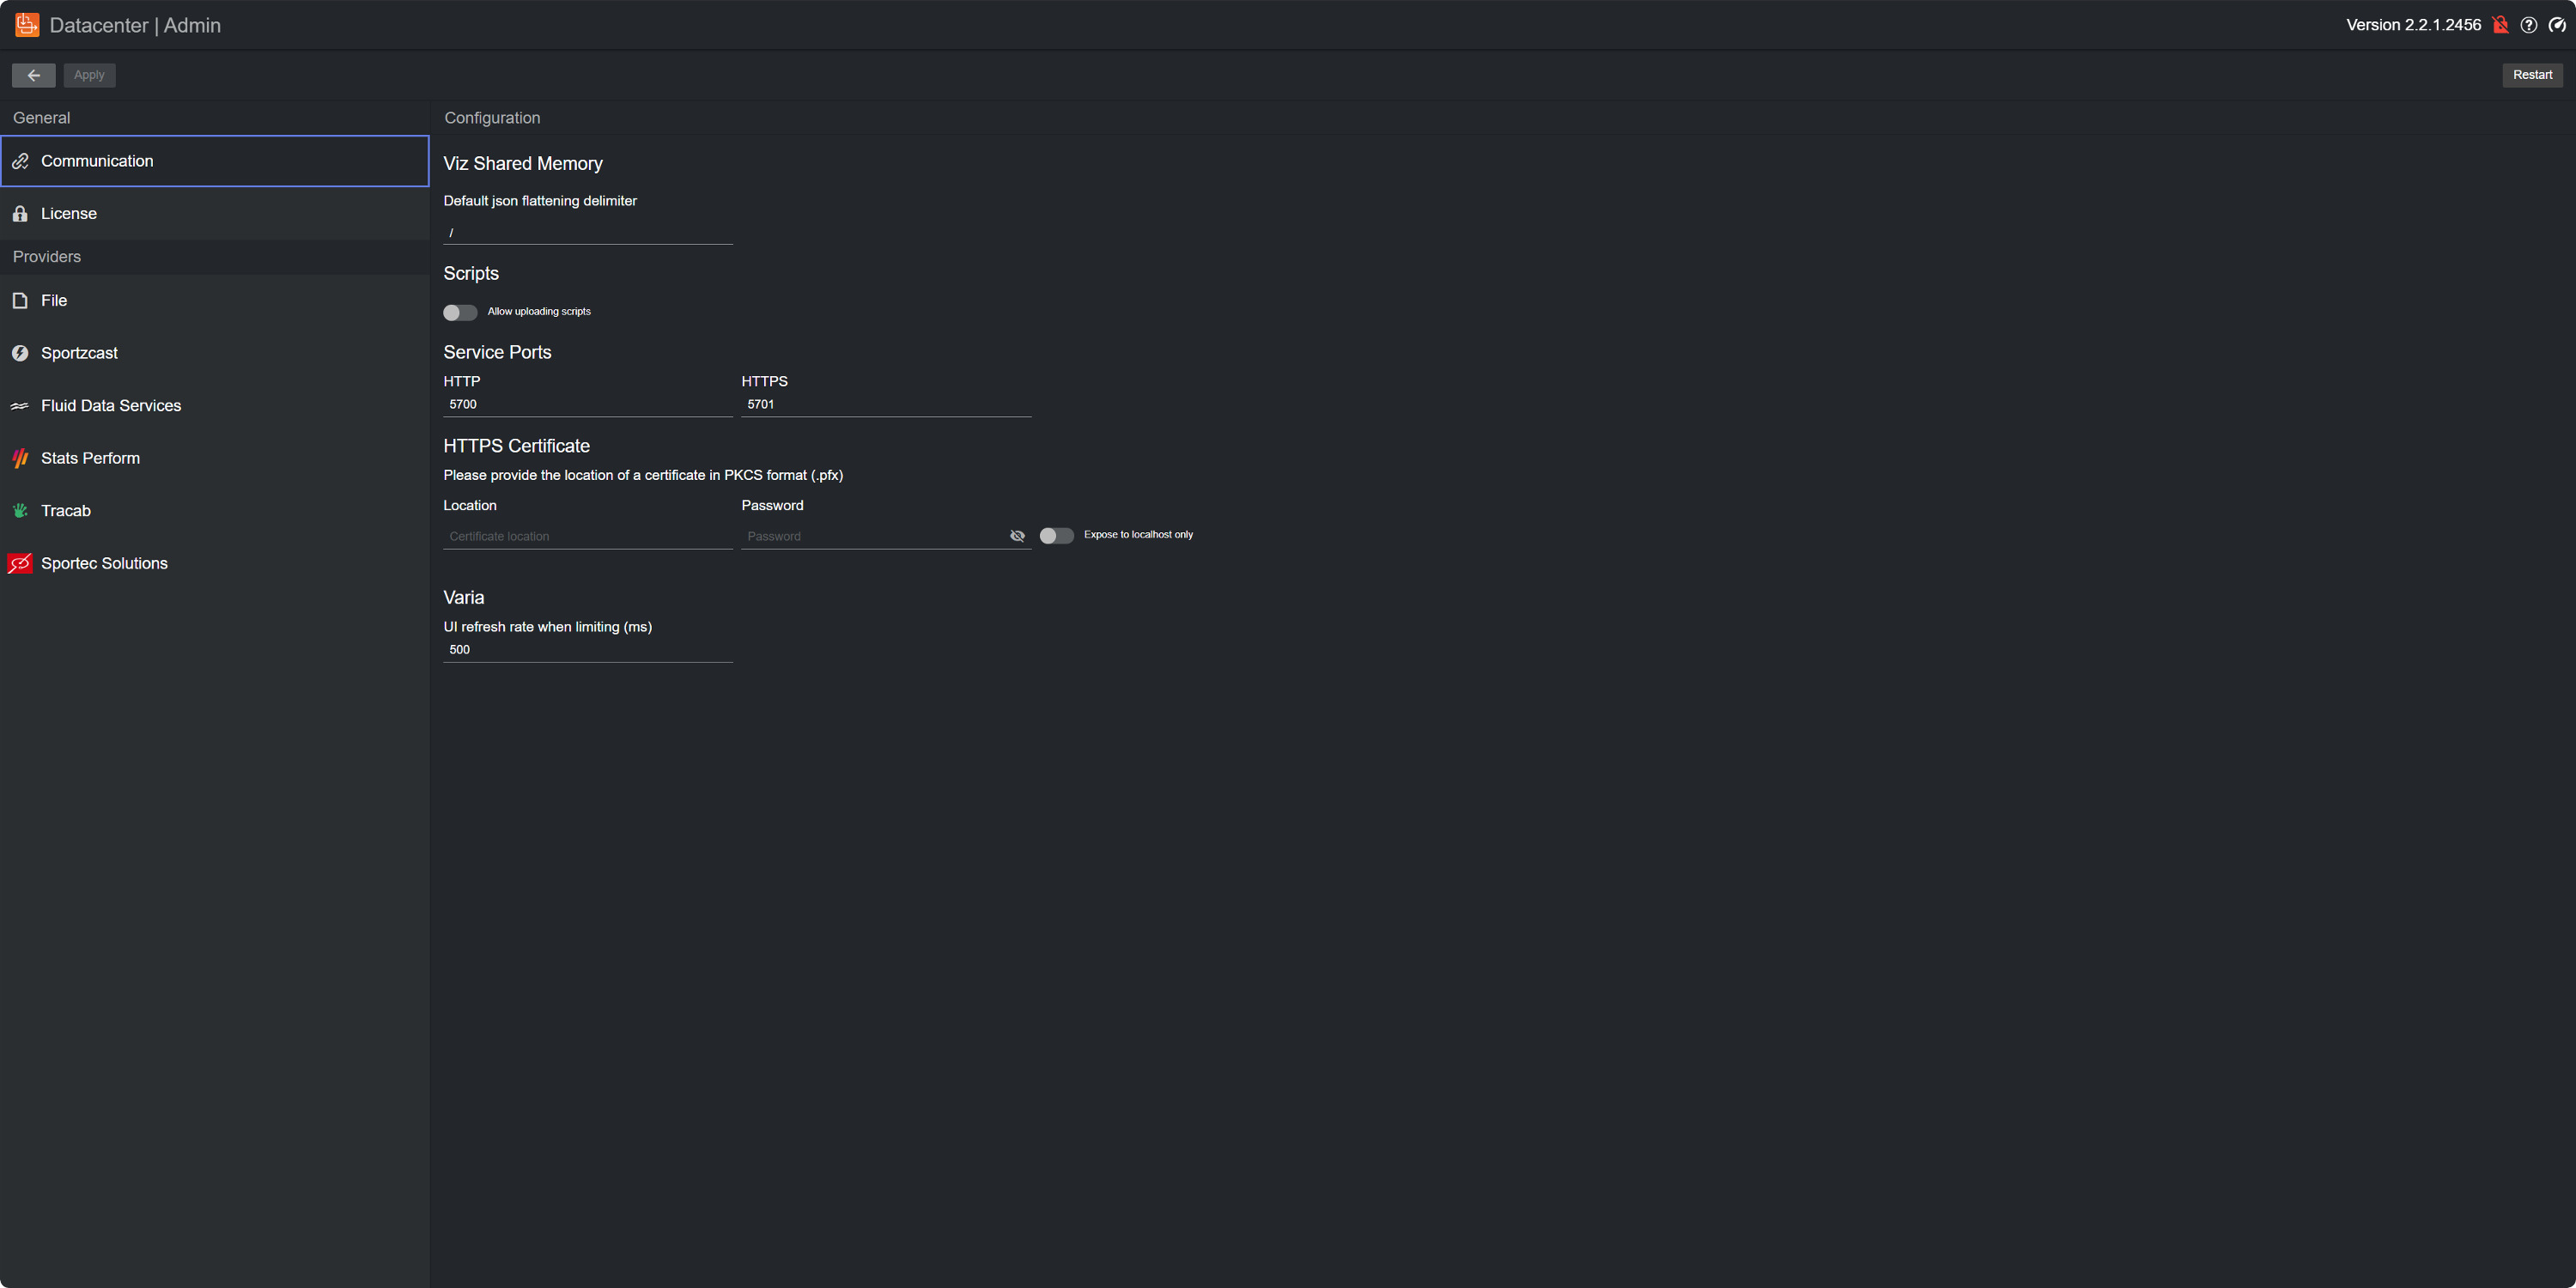
The General configuration page is where you can configure settings related to the Datacenter service:
Communication
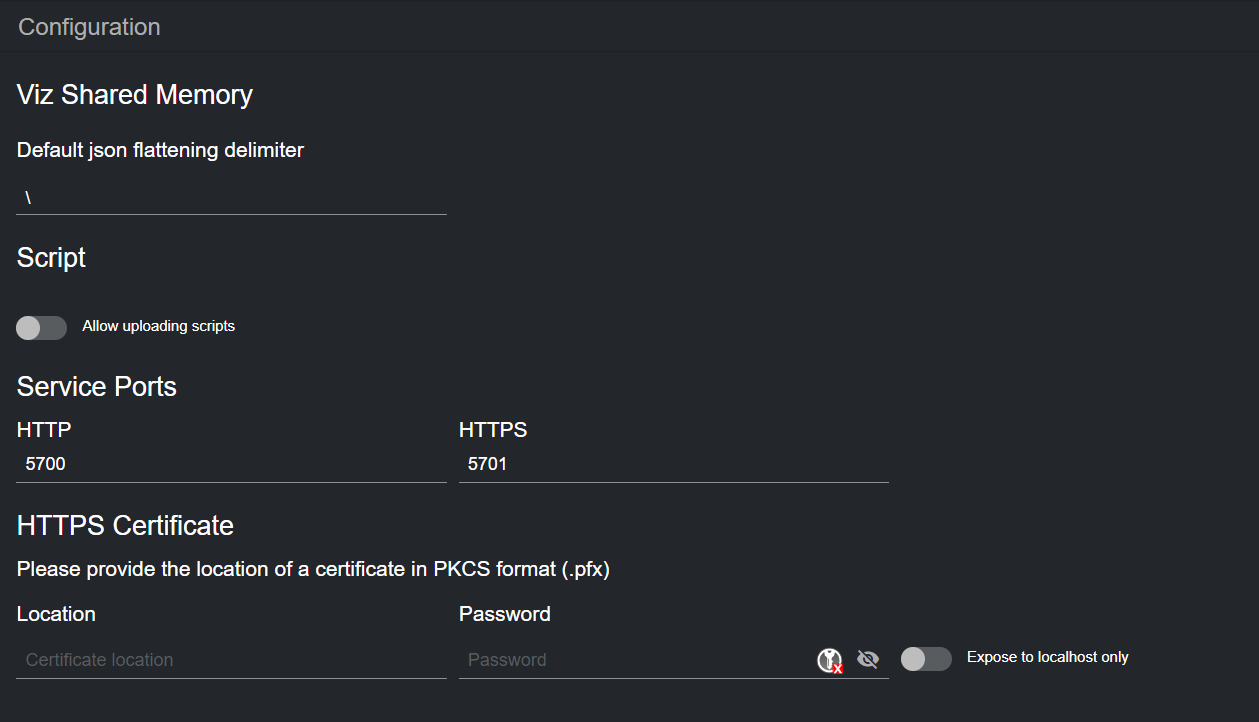
Under communication you can configure the shared memory and your HTTPS certificate.
Viz Shared Memory
The json flattening delimiter specifies the delimiter to use when flattening an incoming JSON payload. The default value is \ .
Note: The character \ cannot be used in SHM keys used on Viz Engine with control channels. When control channels are used, nested channels in your scene can be accessed via the . character. Therefore, it can be used as a delimiter to map to control channels in the scene.
Script
Use the Allow uploading scripts toggle to enable or disable script uploading in the main page. Uploading a script can be useful when you have no access to the machine where Datacenter runs.
Script Uploading: Datacenter does not vet uploaded scripts, therefore, allowing the upload of arbitrary scripts to Datacenter can pose a security threat. We strongly recommend to enable scripts uploading, only when strictly necessary and for the time required.
Service Ports
By default, Datacenter uses ports 5700 and 5701 for HTTP and HTTPS communication, respectively. Should any of these ports be unavailable for the system, they can be changed in the dedicated text input field.
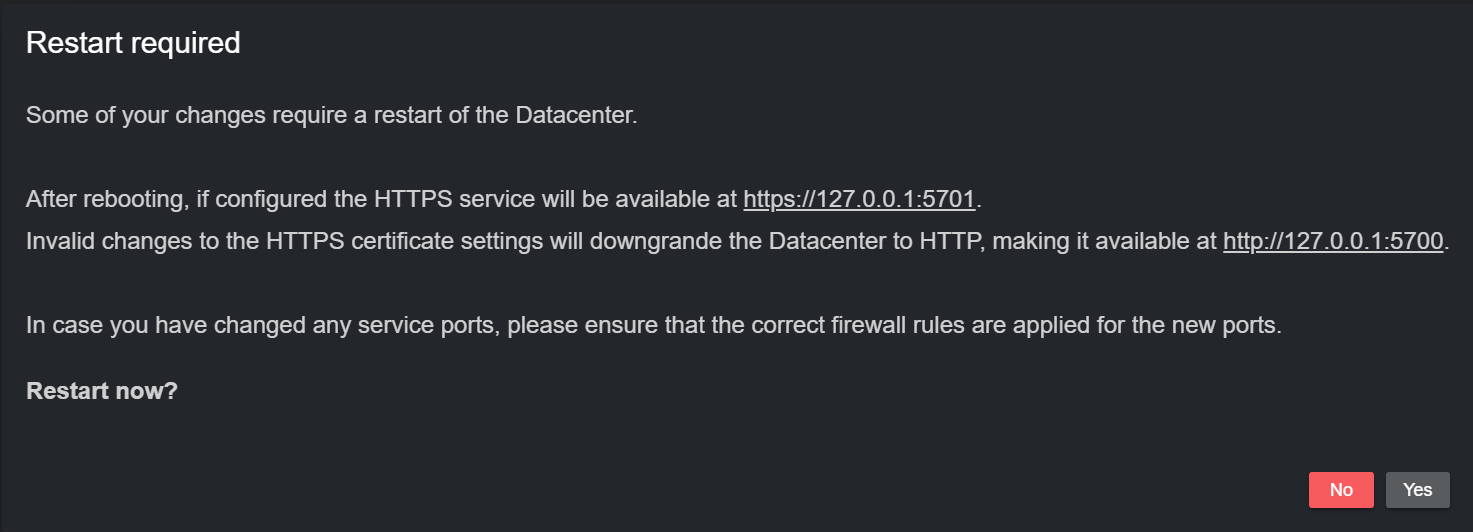
After clicking the Apply button, a dialog prompts you to confirm whether you want to restart the service using the newly configured ports. Please note the new addresses.
Firewall Exceptions: By default, the Datacenter installer, installs firewall rules for ports 5700 and 5701. When changing the service ports, you must ensure that correct firewall rules are applied for them, otherwise Datacenter may be unreachable.
HTTPS Certificate
Datacenter runs an HTTP service that is reachable by localhost only on port 5700, by default. This lowers security risks, and makes sure that unprotected communication is not exposed outside of the service machine.
When running as an HTTP service, a red, broken lock is shown in the top-right corner of the UI . Although HTTP is the default service, Datacenter is capable of running an HTTPS secure service, which handles communication using the HTTPS protocol on port 5701. To do so, input the location of your signed certificate and its password in the dedicated text input fields, and click on Apply changes.
A dialog prompts you to confirm whether you want to restart the service, as it is required to upgrade to HTTPS.
By default, the HTTPS service listens to all network interfaces on port 5701, as this allows communication in and out of the Datacenter service machine. However, also the HTTPS service can be limited to listen to the localhost only.
Use the Expose to localhost only toggle and apply changes if required.
When running Datacenter as an HTTPS service, a green, closed lock is shown in the top-right corner of the UI .
Note: To setup Datacenter to run an HTTPS service, a signed certificate in PKCS format must be provided (this can usually be obtained by your system admin). Please note that the Datacenter does not provide signed certificates. Should you not already have a certificate-authority provided certificate, there exist several services that can issue signed certificates (for example, letsencrypt.org).
Note: When running Datacenter as an HTTPS service, an HTTP version of the service is also started on localhost on port 5700. As in the standard HTTP version of Datacenter, this service listens to localhost only.
Create Self-Signed Certificates
In case you are not able to obtain a certificate-authority provided certificate, a self-signed certificate can be used to run the Datacenter as a HTTPS service. This, however, is not the recommended nor preferred way to setup the Datacenter in HTTPS mode, and should be only done under the supervision of your IT team and following an informed decision to use self-signed certificates. While self-signed certificates are easy to obtain, they do not provide any trust value, and are rejected by many communicating actors, including some data providers. Nevertheless, should a self-signed certificate be required, the following steps can be followed.
Info: OpenSSL can be used to create a self-signed certificate. While OpenSSL is already installed on many major Linux distributions, on Windows workstations one may use the one shipped with Git, or install it from known package managers (for example, chocolatey).
On your workstation, open a Terminal and then follow the steps below:
Create a private key.
$ openssl genrsa -des3 -out domain.key 2048
Info: Make a note of the "PEM pass phrase", as this is used later in this guide.
Create a certificate sign request (CSR).
$ openssl req -key domain.key -new -out domain.csrEnter pass phrasefordomain.key:You are about to be asked to enter information that will be incorporatedinto your certificate request.What you are about to enter is what is called a Distinguished Name or a DN.There are quite a few fields but you can leave some blankFor some fields there will be a default value,If you enter'.', the field will be left blank.-----Country Name (2 letter code) [AU]:XXState or Province Name (full name) [Some-State]:YYLocality Name (eg, city) []:YYyyOrganization Name (eg, company) [Internet Widgits Pty Ltd]:MY_ORGOrganizational Unit Name (eg, section) []:MY_UNITCommon Name (e.g. server FQDN or YOUR name) []:MY_DATACENTER_HOST_NAMEEmail Address []:Please enter the following'extra'attributesto be sent with your certificate requestA challenge password []:An optional company name []:Create a self-signed certificate. /info
openssl x509 -signkey domain.key -indomain.csr -req -days 365 -out domain.crt
Info: If you are required to issue the "Common Name", you can use the same MY_DATACENTER_HOST_NAME as used above.
Create a Self-Signed Root CA.
$ openssl req -x509 -sha256 -days 1825 -newkey rsa:2048 -keyout rootCA.key -out rootCA.crt
Info: Make note of the PEM pass phrase, as this is used in the next step when signing certificates requests.
Common Name for CA
Info: Use a different "Common Name" than the one used previously, for example ROOT_HOST_NAME.
Sign the CSR with the Root CA.
$ openssl x509 -req -CA rootCA.crt -CAkey rootCA.key -indomain.csr -out domain.crt -days 365 -CAcreateserialConvert the PEM to PKCS12 (as needed by Datacenter).
$ openssl pkcs12 -inkey domain.key -indomain.crt -export-out domain.pfx
Info: Make a note of the password used as "Export Password", this is required in the Datacenter Settings page.
Copy the pfx file to the machine running Datacenter if required and use it to launch the Datacenter in HTTPS mode.
Varia
Set the UI refresh rate when limiting (ms) to the desired milliseconds to control the slowing-down factor of the UI refresh rate when running in limited refresh rate mode (the Application Bar shows the speedometer icon in yellow ).
License
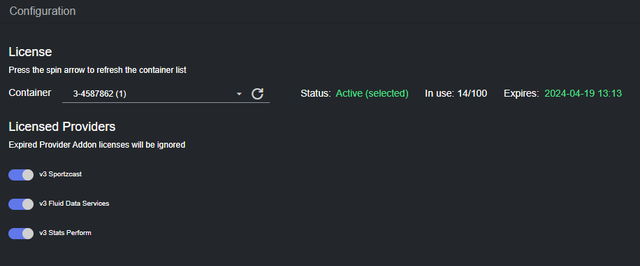
In this section you can configure the license to use with Datacenter, as well as the licensed providers. Without a valid Datacenter Core V3 license, no outputs can be configured, nor datasets created, thus no data is streamed out of Datacenter. Additionally, certain providers require specific addons license.
Datacenter requires a WIBU based software license. The CodeMeter license service checks for available licenses and presents the relevant license containers in a dropdown menu next to the License label.
When selecting a license from the list, its information is shown on the right. Additionally, the available (and not expired) Providers license addons on the container, are listed as toggles.
If you do not see the container you wish to use, click the refresh button to trigger a new scan of available licenses.
The currently selected container is listed as Active (selected) in the information line. The available containers and expiration date are also shown in the same line. If the license is not expired, its expiration date is shown in green:
Conversely, expired licenses list their expiration date in red. Similarly, licenses that are not selected, are listed as Inactive (not selected).
After choosing a container, please allow the software to fetch the licensed providers addons, and then select the ones you want to use from the list of toggle buttons that appears next to the Licensed Providers label. When done, click on Apply changes.


