To find out more about the project, check out the Jira Ticket and the repositories: application and LensFileEditor.
Click on the links for detailed documentation about the API and about the program.
This project leverages the pattern recognition and camera calibration capabilities of OpenCV to automate the lens calibration workflow. We decided to use Charuco (Chessboard pattern with Aruco Markers) patterns for our calibration patterns as calibration using chessboards is proven to be precise. Additionally, with Aruco Markers (which are basically visual codes to recognize an ID) even occluded or partially visible boards are recognized and useable for calibration.
Example patterns can be found here which can be printed and placed on a flat surface. You can print the pdfs which should ensure a standardized size. If you print the pngs be sure to measure the length of the tiles and markers in meters once they are printed. Multiple patterns can be detected simultaneously, provided they belong to different "dictionaries" (aruco-codes with different dimensions such as 4x4 or 5x5). If you want to generate your own charuco-patterns, you should have a look at the opencv/modules repository, specifically at this example. This programm uses "SMURF" to grab the distorted "pure" camera frames using shared memory. Hence why this repository is based on the SHM examples repository.
Setup
In Viz Artist, make a scene with your live-input channel. Make sure that when you go to Media > Live Channel > Aux >SHM Aux Mode is set to Send and Undistort is unchecked.
In Config >Video Input: Live Input you need to set a different channel to SHM - SMURF and write down the Shm Key und Shm Settings.
Look up externalSyncKey in \ProgramData\vizrt\VizEngine\VizEngine-0.cfg under SHMSyncMasterKey.
Workflow
To start, you should print out and measure your patterns as described before or just use the template PDFs to print them out.
Start Viz Engine with a scene containing your live-input setup for SHM.
Start Tracking Hub and the LensFileEditor within.
Click on Start Application in the Lens File Editor under Automation.
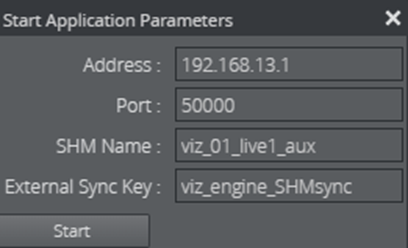
Now enter the required parameters as seen:
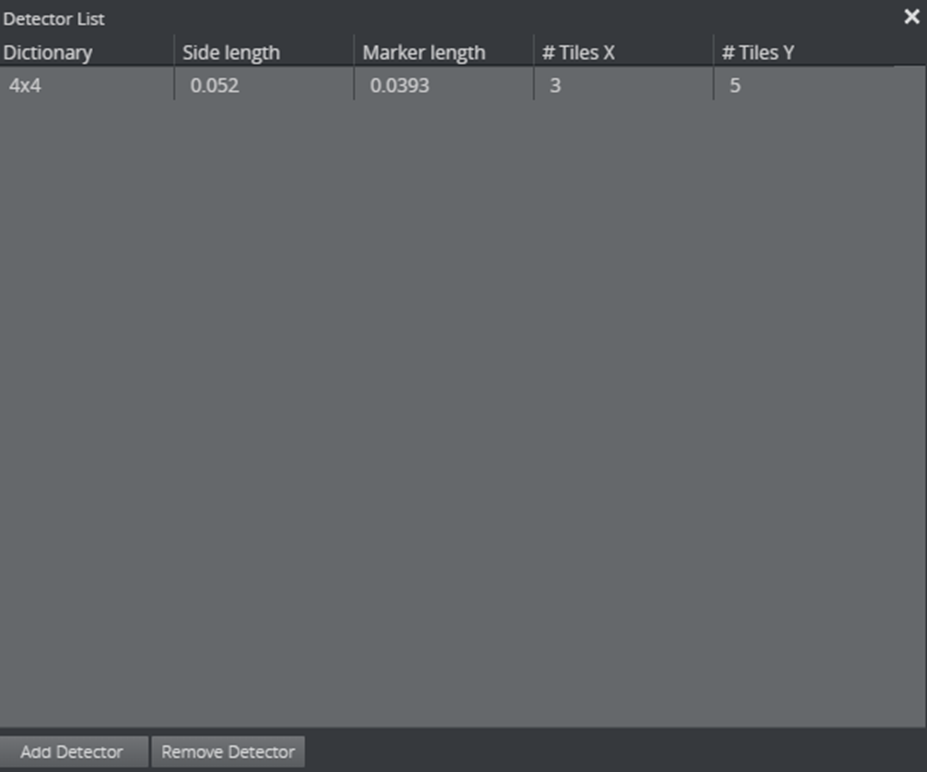
Click on Detectors to access the detectors list:
then Add Detector.
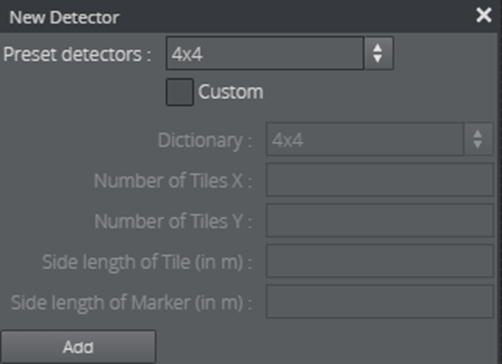
Now select your preset or enter the measurements and the used dictionary as seen here:Close the detector list dialog.
300pxIn the "Point Matrix" of the LensFileEditor click on "AutoCatch" in the top right corner. This enables automatic selection of your zoom/focus points if you adjust them correctly.
Afterwards, position your camera towards the patterns, ensuring they are at least partially visible, while maintaining a consistent zoom and focus setting.
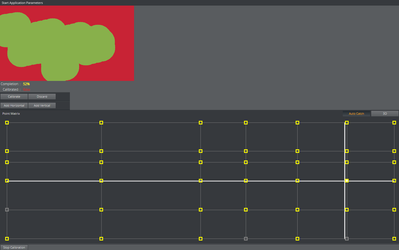
Now click on Start Calibration. This opens a window showing you your current captures points (red is not captured, green is captured), captured percentage, if you have calibrated this point or not, a button to calibrate the current point, a button to discard the current progress of that point and a view of the Point Matrix.
The program automatically captures calibration points every two seconds.
When you are satisfied with the coverage click on Calibrate. If you make a mistake, click Discard.
Calibrate your points until you are satisfied (You can calibrate points later as well as it saves your progress).
If you are done click on Stop Calibration which closes the calibration window.
If you are absolutely sure you won't calibrate it anymore, click on Stop Application.


